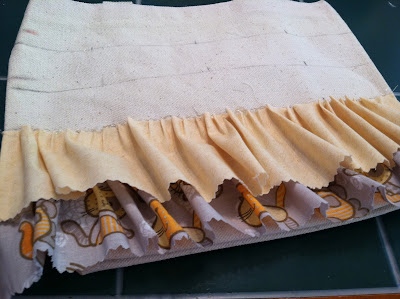
I found a tutorial from Scattered Thoughts of a Crafty Mom for a No-Sew Ruffled Tote and I knew it was something I could probably do without too much cussing or bloodshed.
"No-sew" projects are wonderful. You can work with fabric but not have to get out the owner's manual for the sewing machine you got two years ago and is now collecting dust. Not that any of us here have that problem, right? Right.
I went to Hobby Lobby (cue angels on high singing) and got my materials. Since I also wanted to make this for my Iowa friend for her birthday, I went looking for fabric that I thought she would like. She is a cat lover so I wanted to find some fabric that would go along with that theme. I was lucky enough to stumble upon some.
Here are the materials I used.
There's a calculator and ruler board for measuring and figuring out your fabric lengths and make your ruffled row marks. (Not that I used that crap or anything.) You also will need a tote bag, good sharp scissors (be careful, this is where the bloodshed could factor in), fabric (I used 4 different patters), ribbon, and glue gun.
I also used these essential crafting tools.
Coffee for focus, chocolate for pep, and a brand-new iPad for cheating, I mean, to follow the tutorial. Yes, I am the proud new owner of an iPad. Can you believe it? It was an anniversary present to me from my wonderful (this week) bosses to celebrate my 15 years of working for them. They knew I've wanted one forever and it was cheaper than writing a bonus check. So that worked out all the way round. I've named her Bellatrix. I just decided that right here and now. Yes, I love that Harry Potter. And Bellatrix has the best name out of all the characters. Anywho...back to the tote.
You are supposed to measure the size of your bag and the size of your fabric and then mark your bag so you know where you need to follow your line across. I started with this step. I measured and cut my fabric. Made the marks for the lines and it just didn't look right. So I went back and used the method I have used for years and years, sometimes it even turns out well. I eyeballed it.
This is the first row. I only burned myself about 5 times on this row. The cussing was the worst part. That's why I never do videos.
See my marks? Here's the first row done. No bloodshed but I do need to remember to stock up on some aloe lotion.
Second row.
You do have to move quick once you start putting down the hot glue. There's a section in this second row that didn't get ruffled up as much as the rest of the row because I was too busy cussing and peeling the drying hot glue off my fingers.
Third row.
Hey, it's starting to look like something now. Still wasn't sure that "something" was gonna be something cute.
Fourth row.
Almost all done. I would say that this whole measuring, cutting, glueing, ruffling crap portion took around 30 minutes so it's not a project that takes forever. Once you start ruffling, and not burning yourself, it goes pretty fast.
Now it's time to add the ribbon. I now wished I had had some ribbon that was a little bit wider but I used what I had.
I was almost finished but wanted to add some pretty flowers to set it all off. I grabbed my Big Shot and some felt and made some flowers. Hot glued the flower layers together and topped them off with a button.
And here you have the end result.
I think it turned out really cute. My Iowa friend likes it. She uses it as a lunch tote. These totes will probably be what I make as Christmas gifts for my friends this year. I just have to prepare my fingers and my family's ears for it all.


